How to Use the HD-151X Wireless Gamepad Controller
The HD-151X wireless gamepad is one of those controllers that just works well. I’ve used it on my PC, PS3, and even my Android TV box without a problem. People like it because it’s simple to set up and supports a bunch of devices right out of the box.
It comes with solid features. You get 2.4GHz wireless connectivity for a stable link, which means less lag compared to Bluetooth controllers. The dual vibration motors feel nice in games. Turbo mode is handy for shooters, and those multimedia keys make it easy to control music or video. The built-in rechargeable battery lasts long enough for hours of play.
If you’re wondering how to use the HD-151X controller, this HD-151X wireless gamepad manual will cover all the steps. From charging to pairing and customizing, you’ll get it all.
Follow this HD-151X compatibility guide, and you can easily set up your HD-151X wireless joystick for the best gaming experience. Want more expert advice? Check out these controller tips to get the most out of your gamepad.
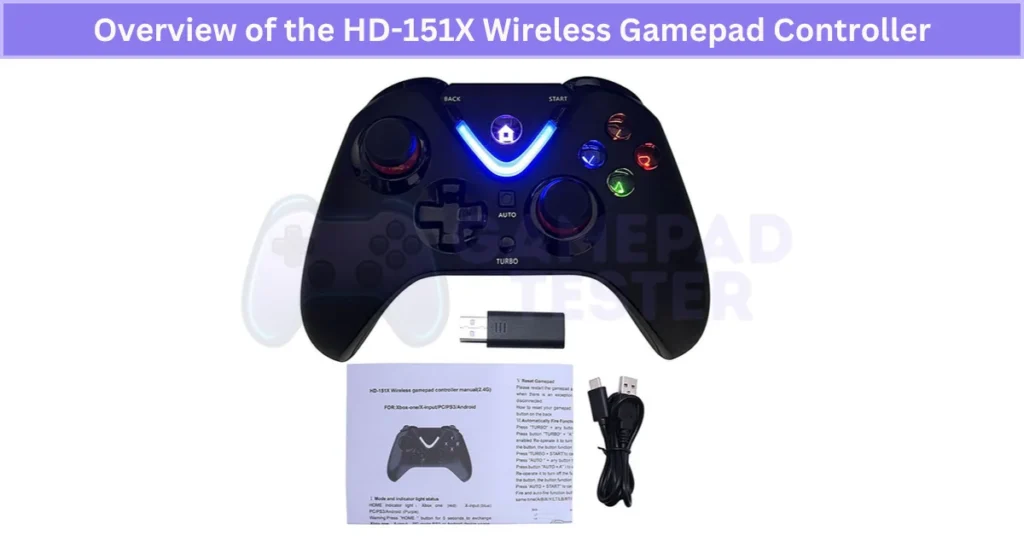
Overview of the HD-151X Wireless Gamepad Controller
The HD-151X is a multi-device wireless gamepad made for gamers who want smooth control without messy wires. It works well on PC, PS3, Android TV boxes, and even smart TVs, so you can play on almost any screen you have.
This HD-151X wireless gamepad controller uses a 2.4GHz wireless connection with a USB receiver. That means lower latency and a stronger signal compared to standard Bluetooth. It feels more stable, which is great when every second counts in a game. The controller also has dual vibration motors for feedback and a turbo function that makes rapid-fire shooting easy.
The design is ergonomic, so your hands don’t hurt after long sessions. Plus, the rechargeable battery keeps you going without replacing batteries all the time.
For its price, this wireless controller for PC and Android TV is a solid pick. It’s simple, reliable, and works well across platforms.
Step 1: Charging the HD-151X Wireless Gamepad Controller
Before using it, make sure to charge the HD-151X wireless controller fully. This helps with battery calibration and makes it last longer.
Here’s how to do it:
- Plug the charging cable into the controller and connect it to a USB power source like a PC or a wall adapter.
- Check that the cable fits properly in the port.
- Look for the indicator light. It turns red when charging and usually goes off or green when done.
One quick tip: don’t play while it’s charging. Waiting for a full charge is better for wireless controller battery care and gives you a longer play session later.
These HD-151X gamepad charging instructions are simple, but they make a big difference in performance.
How to Charge the HD-151X Controller Using a USB Cable
Charging with a USB cable is the easiest and safest way to power up your HD-151X controller. It keeps the process simple and avoids issues that come with low-quality chargers.
Here’s how to do it:
- Use a micro-USB to standard USB cable.
- Plug the micro-USB end into the controller.
- Connect the standard USB end to a power source like a PC, wall adapter, or power bank.
Pay attention to the HD-151X LED charging indicators:
- Red: Battery is low
- Blue: Charging in progress
- Green: Fully charged
- Flashing: Controller is on or in standby
To keep your controller in good shape, avoid overcharging or undercharging. A full charge before unplugging helps the battery last longer. Also, use a stable power source. Charging from a proper wall adapter or the official charger is safer than random USB ports, which can send uneven voltage and harm the battery.
This HD-151X battery charging guide will keep your controller ready for long gaming sessions without problems.
How to Charge the HD-151X Controller Using a Power Adapter
You can also charge the HD-151X with a power adapter instead of using a PC USB port. This method is fast and easy, but you need the right specs to avoid damage. Always use an adapter with 5V DC output and at least 500mA. Anything higher can harm the battery or controller circuits.
Here’s the simple process:
- Insert the DC connector into the charging port on the back of the controller.
- Plug the adapter into a wall outlet.
- Watch the LED indicators on the HD-151X gamepad:
- Red = Low battery
- Blue = Charging
- Green = Fully charged
For best battery life, charge until the green light shows and then unplug. Don’t overcharge or let the battery go completely dead often—it shortens lifespan.
This HD-151X DC charging guide helps you keep your controller safe and ready for gaming.
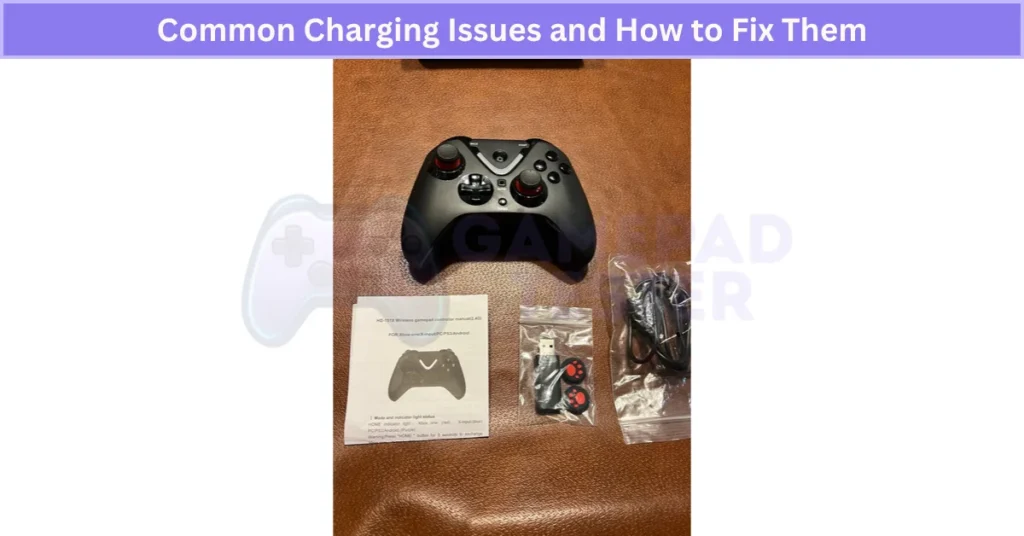
Common Charging Issues and How to Fix Them
Charging problems happen, but most are simple to solve. Here are the most common HD-151X charging problems and how I fix them:
- Not Charging – First, check the USB cable. If it’s worn out or loose, swap it with another one. Using the official cable or a certified one works best. If you’re troubleshooting another device, this also applies to the Mocute Gamepad Controller. Also, try a different adapter or USB port.
- Slow Charging – This usually means the adapter is weak. Go for a 5V/1A or higher-rated adapter. If that doesn’t help, clean the charging port with a soft brush. Dust can block the connection.
- Battery Not Holding Charge – If your wireless controller still won’t stay charged after a full cycle, the battery may be old. At this point, I’d replace the battery or contact support.
One last tip: keep the charging port clean and dry, and avoid cheap cables. Official or certified cables reduce charging issues and keep your gamepad’s battery healthy for longer.
Step 2: Connecting the HD-151X Wireless Gamepad to Different Devices
The HD-151X is super flexible. You can connect the HD-151X wireless gamepad using a 2.4GHz USB receiver or Bluetooth. The USB dongle is the best choice for zero-lag gaming, while Bluetooth works well for devices without USB ports.
How to Connect the HD-151X Wireless Gamepad to a PC
Connecting your HD-151X to a PC is simple and reliable because it uses a 2.4GHz USB receiver instead of Bluetooth. This method gives minimal input lag, which is perfect for fast-paced PC gaming.
Steps to Connect:
- Plug the included USB receiver into an open USB port on your PC.
- Make sure the receiver is in an open spot for a strong signal.
- Turn on the controller and press the Home button. This starts the pairing process.
LED Indicator Guide:
- Solid Blue: Pairing in progress
- Flashing Red: Not connected
- Flashing Blue: Connected but weak signal
- Flashing Red & Blue: Connected and stable
Once the LED shows a stable connection, you’re ready to game.
Tip: Turn off the controller or remove the USB receiver when not in use. It saves battery and prevents signal conflicts with other devices.
This quick HD-151X PC setup guide makes sure your controller pairs right every time for a smooth experience.
How to Connect the HD-151X Controller to a PS3 Console
Connecting the HD-151X to a PS3 is easy, but you need to switch the USB receiver to PS3 mode first. This step ensures the buttons map correctly and helps reduce input lag compared to using PC mode.
Steps to Connect:
- Find the small mode button on the side of the USB receiver. Press it to switch from PC to PS3 mode.
- Plug the receiver into any available USB port on your PS3.
- Make sure the antenna faces an open space for a strong signal.
- Turn on the controller and press the Home button. The pairing process will start.
LED Indicator Guide:
- Solid Blue: Pairing in progress
- Flashing Red: Not connected
- Flashing Blue: Weak signal
- Flashing Red & Blue: Connected and stable
After it connects, you’re ready to play.
Tip: Turn off the controller or remove the USB receiver after gaming. This prevents battery drain and avoids conflicts with other devices.
This HD-151X PS3 pairing guide makes setup quick and smooth.
How to Connect the HD-151X Controller to an Android TV Box or Smart TV
You can connect the HD-151X controller to an Android TV Box or Smart TV in two ways: USB receiver or Bluetooth. The USB option is best for stable and low-lag gaming, while Bluetooth works well when your TV doesn’t have a free USB port.
Option 1 – USB Receiver
- Plug the 2.4GHz USB receiver into the TV’s USB port.
- Turn on the controller and press the Home button to start pairing.
- Wait for the LED to flash and then stabilize.
Option 2 – Bluetooth Pairing
- Go to Settings → Bluetooth → Pair New Device on your TV.
- Turn on the controller and hold Home + Start to enter pairing mode.
- Select HD-151X from the device list.
For the best gaming experience, I always use the USB receiver because it gives a stronger signal and less input lag than Bluetooth. But if your Smart TV doesn’t have a USB port, Bluetooth is a good backup option.
This simple HD-151X Smart TV gamepad setup works for most Android-based TVs.
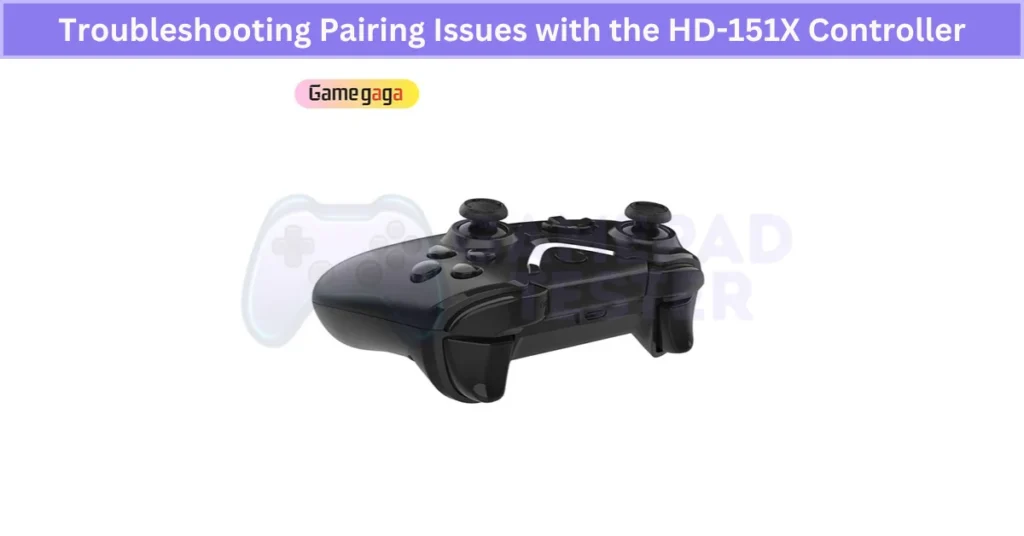
Troubleshooting Pairing Issues with the HD-151X Controller
Pairing problems happen, but most HD-151X controller pairing issues are easy to fix if you follow a few steps.
- Controller not detected – Make sure the USB receiver is in the correct mode (PC, PS3, or Android). Switching modes solves this most of the time.
- Bluetooth pairing fails – Restart both the controller and your device. Then try pairing again. Clearing old pairings from your device can also help.
- Interference problems – Keep the controller close to the device and remove obstacles or other wireless gadgets that might cause signal issues.
- Low battery – If the battery is weak, pairing might fail. Charge the controller fully before trying again.
If nothing works, reset the controller and check for firmware updates. Updating the firmware often fixes pairing bugs and improves wireless stability.
These simple steps usually solve most wireless gamepad connection problems and help you fix HD-151X Bluetooth pairing without stress.
How to Connect the HD-151X Controller to Android Smartphones and Tablets
The HD-151X works with Android phones and tablets through Bluetooth or the USB receiver (with OTG support). Both options are simple, but using the USB receiver offers lower latency for better gaming performance.
Bluetooth Connection
- Turn on Bluetooth on your Android device. If you want more mobile-friendly options, try using your Android Phone As A Gamepad.
- Switch on the controller and hold Home + Start to enter pairing mode.
- On your device, scan for new devices and select HD-151X from the list.
- Wait for the LED to stop flashing, which means it’s connected.
USB Receiver Connection (OTG Required)
- Plug the USB receiver into your phone or tablet using an OTG adapter.
- Turn on the controller—it should pair automatically.
Tips: Keep the controller close to your device during pairing. Make sure your phone supports USB OTG before using the receiver. If you want the best response time, go with the OTG method since it’s more stable than Bluetooth.
This makes HD-151X Bluetooth pairing on Android or USB setup quick and easy.
Connect HD-151X to Android TV or Smart TV via USB Receiver
Using the 2.4GHz USB receiver gives a stable link and almost zero input lag, which is perfect for fast gaming on big screens.
Steps to Connect:
- Press the small button on the USB receiver to switch it to Android mode.
- Plug the receiver into any USB port on your Android TV box or Smart TV.
- Keep the antenna in an open spot for a stronger signal.
- Turn on the controller and press the Home button to start pairing.
Tip: Disconnect the receiver when you’re done. It saves power and stops interference with other wireless devices.
This HD-151X USB connection for Android TV method beats Bluetooth when you want lag-free performance.
Connect HD-151X to Android TV or Smart TV via Bluetooth
Bluetooth pairing is the best option when your TV doesn’t have a free USB port. It’s easy and quick, but keep in mind that USB mode still offers less input lag for games that need fast reactions.
Steps to Pair:
- On your Android TV or Smart TV, go to Settings → Bluetooth → Pair New Device.
- Turn on the HD-151X controller and press Home + Start to enter pairing mode.
- On your TV, select HD-151X from the list of available devices.
LED Indicators:
- Solid Blue: Pairing in progress
- Flashing Red & Blue: Connected and stable
- Flashing Blue: Connected but weak signal
- Flashing Red: Pairing failed or disconnected
Tips for Best Performance:
- Keep the controller within 10 meters of your TV.
- Disconnect Bluetooth after gaming to save battery.
This simple HD-151X Bluetooth connection setup works for most Android TVs and Smart TVs without a USB option.
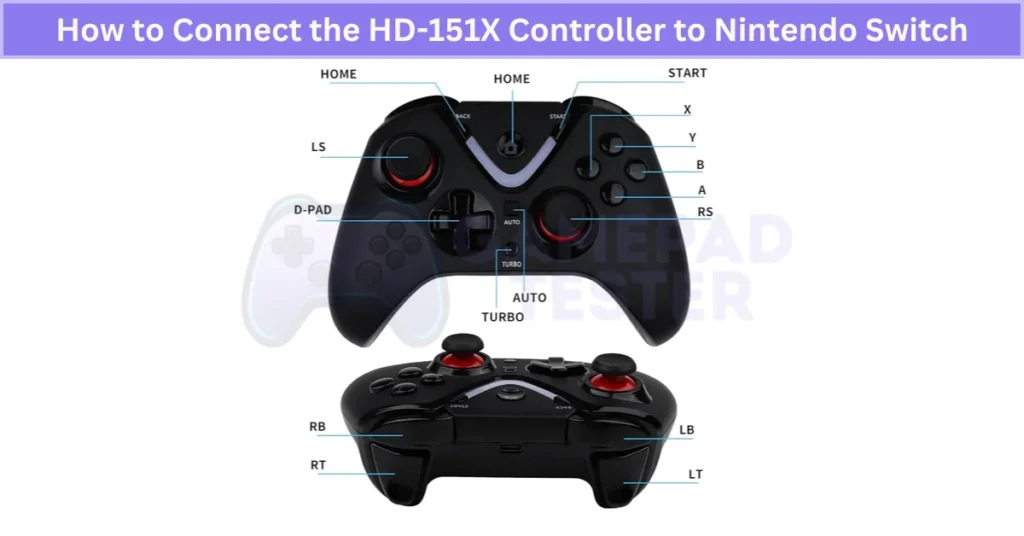
How to Connect the HD-151X Controller to Nintendo Switch (If Supported)
Nintendo Switch compatibility with the HD-151X depends on your controller’s model and firmware. Make sure your controller firmware is up to date before pairing.
Bluetooth Pairing Method
- On your Switch, go to System Settings → Controllers and Sensors → Bluetooth Devices.
- Turn on the HD-151X and hold Home + Start to enter pairing mode.
- Select HD-151X from the device list when it appears.
USB Receiver Method (If Supported)
- Plug the USB receiver into the Switch dock’s USB port.
- Turn on the controller and press Home to sync.
Nintendo Switch’s Bluetooth stack can be a bit picky, so the USB receiver is usually more reliable for seamless gameplay and less input lag.
Always keep your controller firmware updated for the best Nintendo Switch wireless controller setup experience.
How to Connect the HD-151X Controller to iPhone and iPad
The HD-151X works with iOS devices through Bluetooth or the USB receiver using an OTG adapter. Both methods are simple, but if you want the lowest input lag, the USB option is better.
Bluetooth Pairing Method
- On your iPhone or iPad, turn on Bluetooth in Settings. You can also explore other iPad Gamepad Controller options if you’re comparing compatibility.
- Power on the HD-151X and hold Home + Start until the LED flashes.
- On your device, scan for new devices and select HD-151X to connect.
USB Receiver Method (Lower Latency)
- Use a Lightning or USB-C OTG adapter.
- Plug the HD-151X USB receiver into the adapter, then connect it to your iPhone/iPad.
- Turn on the controller, and it should sync automatically.
Using the USB receiver with an OTG adapter is ideal for competitive gameplay since it cuts input lag compared to Bluetooth. Always keep the controller within 10 meters for a strong signal.
This simple HD-151X iPad controller setup makes gaming on iOS smooth and reliable.
How to Reconnect the HD-151X Controller After Disconnection
Disconnections happen, but getting your HD-151X back online is quick. Here’s how I usually fix it:
- Turn the controller off, then power it back on.
- If you’re using a USB receiver, just press the Home button to reconnect.
- For Bluetooth, check that your device’s Bluetooth is on and within range. Then reselect HD-151X from the paired devices list.
- If it still won’t connect, restart your phone, console, or TV.
Extra Tip: Keep your controller fully charged and avoid interference from Wi-Fi routers or other wireless gadgets. If disconnects keep happening, it might be time for a firmware update, which often fixes stability issues.
This quick HD-151X Bluetooth reconnect guide makes sure you’re back to gaming without stress.
Step 3: Configure the HD-151X Wireless Gamepad for Games and Apps
Setting up the controller the right way makes a big difference in how smooth your games feel. The HD-151X lets you tweak settings for better control and comfort.
Mode Switching
- X-Input Mode: Best for most modern PC games.
- D-Input Mode: Works well for older titles and emulators.
Switch between modes using the small Mode button on the controller or as shown in the manual.
Sensitivity Adjustment
Use the +/- keys or in-game settings to adjust joystick sensitivity. Lower sensitivity gives better accuracy for shooters, while higher sensitivity is great for racing games.
Vibration Settings
Turn vibration on or off depending on the game. It adds realism but can drain battery faster.
Turbo Function
Assign turbo to buttons you press a lot in shooters or fighting games. This feature reduces finger strain during long sessions.
You can also use multimedia keys for play/pause or volume when gaming on Smart TVs or Android devices.
Tip: Save your favorite configuration before starting a game. A quick setup ensures the best performance every time.
How to Switch Between Modes on the HD-151X Controller
The HD-151X supports multiple modes for a reason—each one helps with compatibility across different platforms and apps. Picking the right mode ensures smooth button mapping and avoids weird input errors in games.
Available Modes and What They Do
- X-Input Mode – Works best for modern PC games that recognize Xbox-style controllers.
- D-Input Mode – Good for Android devices, emulators, and older PC titles. This is also the default mode for some units like the Ipega Bluetooth Controller.
- Mouse Mode – Handy for navigating Smart TV menus or apps that don’t support full gamepad control.
How to Switch Modes
Usually, hold the Home button and press a specific key combo, like:
- Home + X → X-Input
- Home + Y → D-Input
- Home + Start → Mouse Mode
(Some button combos vary, so check your HD-151X user manual for exact details.)
Which Mode Should You Use?
- X-Input for PC gaming
- D-Input for Android and classic games (also used by controllers like the Best iOS Gamepad Controller)
- Mouse Mode for UI navigation on TVs
Tip: The mode you pick affects vibration, turbo, and multimedia controls. Use the right one for the smoothest gaming experience.
How to Adjust Sensitivity and Vibration on the HD-151X Controller
You can fine-tune the HD-151X controller for better control and comfort by adjusting sensitivity and vibration. These settings can be changed either through the controller’s built-in options or inside most games and apps.
Ways to Adjust Sensitivity and Vibration
- On the Controller: Some HD-151X models let you tweak joystick sensitivity using button combos or the manual’s function keys.
- In-Game Settings: Most games have sliders for aim or movement sensitivity and vibration strength.
Finding the Right Balance
- For shooters, a higher sensitivity setting allows faster aim movement and quick reactions.
- For racing games, lower sensitivity gives smoother steering. If the analog stick feels too sensitive near the center or starts responding too early, run a quick Deadzone Test to check how much movement registers before input begins.
- Vibration intensity can be raised for action titles or lowered for puzzle games to avoid distraction.
Pro Tip
Proper sensitivity adjustment reduces strain on your thumbs during long sessions, while optimized vibration adds immersion without fatigue. Take a few minutes to experiment—these small tweaks can make gameplay more precise and comfortable.
This quick HD-151X vibration settings and sensitivity guide helps you get the best feel for every game.
How to Use Turbo and Multimedia Functions on the HD-151X Controller
The turbo and multimedia functions on the HD-151X make gaming smoother and media control easier. Here’s how they work and when to use them.
Turbo Function
Turbo mode allows a button to auto-repeat when held, perfect for games needing rapid-fire actions.
- Activate Turbo: Hold the Turbo (T) button and press the button you want to assign (e.g., A or B).
- Deactivate Turbo: Hold Turbo again and press the same button to turn it off.
Pros:
- Great for shooters or fighting games.
- Reduces finger fatigue during long sessions.
Cons:
- Can drain the battery faster.
- May cause slight wear on frequently assigned buttons.
Multimedia Function
This feature turns your controller into a media remote for streaming apps.
- Activate: Hold the Home (house) button until you hear a beep.
- Controls:
- Play/Pause: A button
- Next/Previous Track: D-pad Left/Right
- Volume Up/Down: D-pad Up/Down
- Deactivate: Hold the Home button again until the beep.
Pros:
- Lets you manage music or videos without leaving the game.
Cons:
- Can cause button conflicts during gameplay if left on.
How to Map Buttons on the HD-151X Controller for Custom Controls
Custom button mapping makes gaming easier and more comfortable. It lets you set up controls the way you like or make them more accessible if you have special needs.
Steps to Remap Buttons
- Open the controller settings in your game or use a compatible app for Android/PC.
- Find the button mapping or customization option.
- Select the button you want to change and assign it to a new function.
- Save your configuration and test the controls in-game to make sure everything works as expected.
Why Use Custom Mapping?
It speeds up actions and helps you adapt to games with awkward default layouts. Controllers like the 8BitDo Bluetooth Gamepad also support custom mapping, especially on PC. For players with disabilities or unique preferences, it can make the game much easier to play.
Tip: Create multiple profiles for different games—like one for shooters and another for racing.
This HD-151X button mapping guide makes customizing controls simple, giving you a smoother and more personalized gaming experience.
How to Configure the HD-151X Controller for Emulator Games
Emulator games often need special settings to work well with a wireless controller. The HD-151X makes this easy if you follow the right steps.
Steps for Emulator Setup
- Switch the controller to D-Input mode. Most emulators recognize this mode better than X-Input. You can also check out how Joystick Controllers behave with classic games.
- Open your emulator’s controller settings and start button mapping. Match each function (like A, B, Start, etc.) to your preferred HD-151X buttons.
- Test the controls in a game. Adjust sensitivity for the analog sticks and fine-tune vibration settings if the emulator supports them.
Extra Tip
Many emulators let you enable advanced features like turbo mode and vibration. Setting these up can make retro games feel smoother and more fun.
For best results, check the emulator’s documentation because some have unique controller requirements.
This quick HD-151X emulator game setup guide ensures your controller works perfectly for old-school and modern emulated titles.
How to Enable or Disable Vibration Mode on the HD-151X Controller
Vibration mode makes games feel more real, but it can drain the battery faster. Luckily, the HD-151X lets you turn it on or off anytime.
Steps to Toggle Vibration
- Find the vibration control button on the controller (check your manual if unsure).
- Press and hold this button for about 3 seconds.
- Watch for a quick LED flash or feel a short vibration as confirmation.
When vibration is on, you’ll feel feedback during gameplay. If it’s off, the controller will stay silent even in action scenes.
Why Disable Vibration?
Turning it off during long sessions can save a lot of battery life. It also helps if you prefer a quieter gaming experience or want smoother performance on older devices.
This easy HD-151X vibration setting guide helps you switch modes quickly for better control and longer playtime.
How to Reset the HD-151X Controller Settings to Default
Sometimes the controller acts up—buttons stop working right, or it won’t connect. A quick reset usually fixes this by clearing any corrupted settings.
Steps to Reset the Controller
- Find the reset button on the back of the HD-151X (it’s a small hole).
- Use a paperclip or pin to press and hold the button for about 5 seconds.
- Release the button and turn the controller back on.
- Re-pair it with your device using the usual pairing steps.
Important: Resetting removes all custom button mappings, vibration settings, and profiles. You’ll need to configure everything again.
A full reset often fixes software bugs and improves connectivity when nothing else works. Think of it as a fresh start for your controller.
This simple reset HD-151X controller guide helps restore default settings in seconds.
How to Update Firmware on the HD-151X Controller for Improved Performance
Firmware updates do more than fix bugs—they improve controller performance, add new features, and ensure smooth compatibility with the latest games and OS updates.
Steps to Update Firmware
- Visit the manufacturer’s official support page or download their update tool/app on PC or mobile.
- Connect your HD-151X controller to your PC (or phone) using the USB cable. Make sure the connection is stable.
- Launch the update tool and check for the latest firmware version.
- Click Update and wait until the process completes. Avoid disconnecting the controller during this step.
- Restart the controller after the update.
Tip: Updating your firmware regularly helps prevent connectivity issues, improves input response, and ensures full support for new titles. Skipping updates may cause glitches, especially after major system updates on your device.
This HD-151X firmware update guide keeps your wireless gamepad running at its best for every game.
Common Configuration Problems with the HD-151X Controller and How to Fix Them
Configuration issues can make gameplay frustrating, but most problems with the HD-151X are easy to fix.
Common Issues & Quick Fixes
- Wrong Mode Selected – If your controller isn’t responding, check the mode. Switch between X-Input, D-Input, or Mouse mode depending on your device and game.
- Button Mapping Errors – If controls feel wrong, remap buttons in your game settings or use a configuration app. If nothing works, do a quick reset and set it up again.
- Sensitivity Problems – Joysticks moving too fast or slow? Adjust sensitivity inside the game or controller settings for smoother control.
- Turbo Function Not Working – Make sure turbo is properly activated (Turbo + Button). If it still fails, turn off conflicting features like multimedia mode.
Tip: Update firmware regularly to prevent glitches. For rare problems, check online forums or the official FAQ—they often have fixes shared by other users.
This guide makes solving HD-151X configuration problems simple, so you can get back to gaming fast.
Final Verdict
The HD-151X wireless gamepad is a solid, multi-platform controller that’s easy to set up and packed with useful features like 2.4GHz connectivity, turbo mode, and long battery life. Whether you’re gaming on PC, PS3, Android, or even iOS, this controller delivers smooth performance with minimal lag, especially when using the USB receiver.
To get the best experience, always charge it properly, pick the right mode (X-Input, D-Input, or Mouse), and keep the firmware updated. If issues pop up—like pairing failures or button mapping errors—most can be fixed with a quick reset or remapping. With proper care and setup, the HD-151X remains a reliable and budget-friendly choice for gamers who want versatility and comfort.