
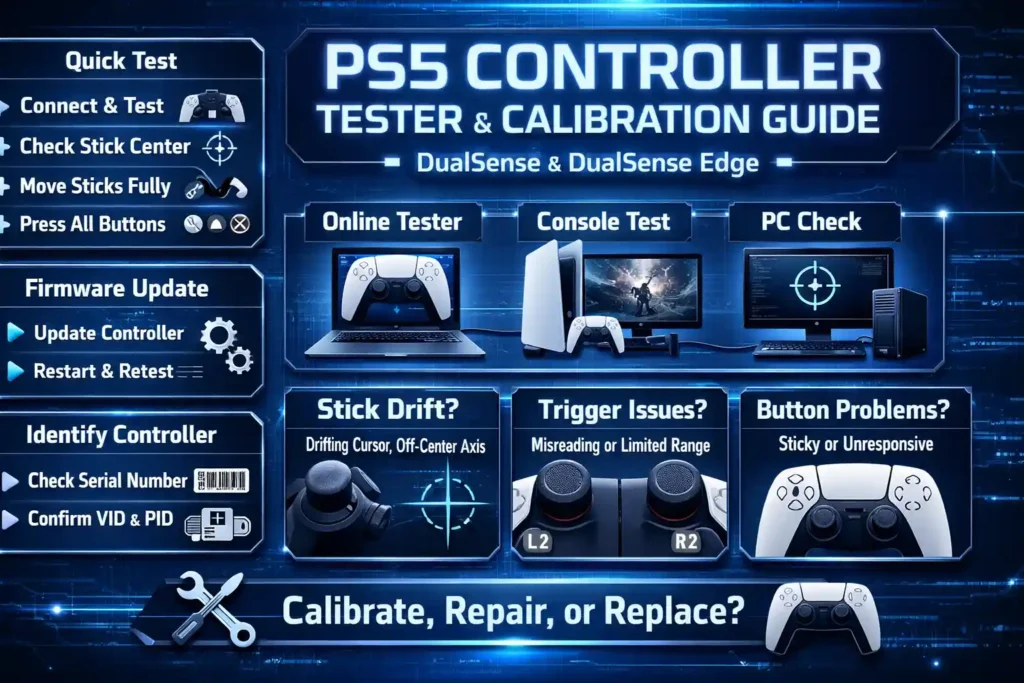
PS5 Controller Test
Test your PS5 DualSense controller online with live button, trigger, D-pad, touchpad click, and analog stick input detection in the browser.
Connection Status
Connect your PS5 controller and press ✖, L2, or a D-pad button to begin the test.
Controller Info
Connect a PS5 DualSense controller (USB or Bluetooth) and press any button to start.
Quick Test Tips
This tool tests Gamepad API input detection only. DualSense adaptive triggers, advanced haptics, lightbar, and audio features are usually not fully testable in-browser.
PS5 Controller Input Test
Buttons & D-pad
Triggers & Sticks
Button availability varies by browser/OS. The PS button (B16) and Touchpad click (B17) may be hidden or unavailable on some setups.
I see this a lot with PS5 players. The aim moves on its own. Or the joystick feels slow and off. That usually means stick drift, a bad deadzone, or input lag. This guide helps you run a PS5 controller tester, check the joystick readings, and try DualSense calibration for both the DualSense and DualSense Edge.
We will test first, read the numbers, fix what we can, and then decide if repair or replacement makes more sense. I will also share simple numeric thresholds, a triage flowchart, and quick authenticity checks like VID PID and serial or FCC info. Just one thing. Results can change a bit because every game uses its own deadzone and settings.
Key Points to Remember Before Fixing Your PS5 Controller
I usually tell people to slow down and test first. A lot of controller problems look the same. But the cause can be very different. So here is the simple flow I follow.
- Run a PS5 controller tester first. Check the joystick, triggers, and buttons using an online tool or PS5 or PC test.
- Write down the center offset and jitter values. These numbers help you see if the problem is real stick drift or just small movement noise.
- Update the controller software and re pair the controller. A DualSense firmware update can fix strange input behavior sometimes.
- Try DualSense calibration or small deadzone changes. Then retest the joystick to see if the readings improve.
- Fix problems by symptom. Drift, jitter, button issues, or disconnects all need different steps. A simple decision path helps here.
- If the controller feels suspicious, check the serial number, model code, and FCC or IC labels. Then inspect the USB VID and PID on a PC.
- And keep proof. Save tester screenshots, photos, and receipts. That helps a lot if you need a warranty claim, return, or counterfeit report.
Quick Start: Run a 60 Second Controller Test First
I always tell people to test the controller before changing any settings. A fast quick controller test can show if the joystick, triggers, or buttons are acting weird. You just want to see how the axis readings, joystick center, and inputs behave. If something looks wrong here, then you know the problem is real and not just game settings.
You can run a fast PS5 controller test here:
Try this simple 60 second script.
- Connect the controller and open a tester page. Keep the controller on a flat surface.
- Do not touch the sticks for about 10 seconds. Watch the joystick center and axis readings for idle drift.
- Slowly move the left joystick in a full circle. Then do the same with the right stick. Check if the axis movement looks smooth.
- Push each stick to the edge in every direction. Make sure the axis reaches full range.
- Run a quick button test. Press every button one by one and watch if the input shows correctly.
- Try a trigger test with L2 and R2. Press slowly and then fully to check the trigger axis.
- Watch for strange things. Random movement, missing inputs, or spikes in the axis values.
If you see something odd, write it down. Those notes help a lot when you start calibration or troubleshooting later.
What You Need to Test Your PS5 Controller (Tools and Setup)
I keep this part simple. You do not need fancy gear to run a PS5 controller tester or check joystick problems. A few basic tools are enough.
Basic tools
- USB cable to connect the controller directly to a PS5 or PC.
- A browser gamepad tester to read joystick axis, buttons, and triggers.
- A PS5 console or a PC with Steam Input enabled for controller checks.
- A computer that can open Device Manager if you want to inspect device details.
- Optional tools like USB device viewers for advanced checks like VID and PID.
Sony controllers often show a USB Vendor ID of 0x054C, which helps confirm the device later during authenticity checks.
Small tip
I like to keep a simple record sheet. Write down joystick readings before and after calibration. That makes it easier to see if things actually improve.
Recommended Setup: Wired vs Bluetooth
You can test using Bluetooth or a USB cable. But wired usually gives cleaner results.
• USB cable connection
More stable input. Better for reading joystick axis and checking drift.
• Bluetooth connection
Good for normal use testing. But wireless interference can sometimes affect readings.
If results look strange over Bluetooth, try the same test again using a USB cable.
Firmware First: Update the Controller Before Testing or Calibrating
Before you try fixes, update the controller software. Firmware can affect how the controller reads inputs.
According to Sony PlayStation Support, users should follow official DualSense troubleshooting and firmware guidance before attempting repairs.
Follow these steps.
- Turn on the PS5 and connect the controller using a USB cable.
- Open Settings on the PS5.
- Go to Accessories and then select Controllers.
- Check for a DualSense firmware update if the system shows one.
- Install the update and wait until the controller software finishes installing.
After the update, run the PS5 controller tester again and compare the results.
If the update fails, try a different USB cable or another USB port on the console. Then repeat the update and test again.
How to Test Your PS5 Controller (3 Reliable Methods)
I usually test a controller in more than one way. One tester alone can miss problems. So I run a controller tester online, then check the console, and sometimes test on PC too. This gives clear axis readout, button mapping, and trigger input results.
One small rule I follow. Keep the test conditions the same every time. Use the same controller, the same connection mode, the same surface, and the same test time. This consistency protocol helps you compare results during a calibration test later.
Method A: Online Controller Tester (Best for Axis and Button Readings)
This method shows the most detail. A HTML5 gamepad tester displays joystick axis movement, button input, and trigger axis values in real time.
Time
About 2 minutes
Difficulty
Very easy
Best for
Checking joystick axis behavior, button input, trigger movement, and early drift test signs
Steps
- Connect the controller using a USB cable or Bluetooth.
- Open the HTML5 gamepad tester page in your browser.
- Wait for the controller to appear in the tester panel.
- Place the controller on a flat surface and do not touch the sticks for a few seconds. Watch the joystick axis readings.
- Move the left stick slowly in a circle. Then repeat with the right stick.
- Push each stick fully up, down, left, and right to test the full axis range.
- Press each button to confirm button input appears correctly.
- Press L2 and R2 slowly to observe the trigger axis movement.
What to record
• Joystick center position
• Any small movement or jitter when idle
• Full axis range during stick movement
• Trigger input behavior
• Button responses
Expected behavior
• Joystick stays close to center when untouched
• Axis movement looks smooth during motion
• No random spikes while the stick rests
• Buttons and triggers respond instantly
If the readings look strange, take a screenshot. You can compare it later after calibration.
Method B: Test on PS5 (Basic Check for Pairing and Controller Feel)
Testing directly on the console helps rule out browser or PC issues. It also shows if the controller has pairing or connection problems.
Time
About 2 minutes
Difficulty
Easy
Best for
Checking pairing stability, button response, and general stick behavior inside PS5 menus
Steps
- Turn on the PS5 and connect the controller using a USB connection.
- Open PS5 settings.
- Go to Accessories and select Controllers.
- Confirm the controller appears in the device list.
- Move the sticks slowly while navigating the menu. Watch for sudden movement or drift.
- Press buttons to check response time and input accuracy.
- Test triggers inside a game menu or settings screen.
What to observe
• Random movement in the PS5 menu
• Delayed button response
• Trigger input problems
• Controller disconnects
According to Sony PlayStation Support, users should follow official troubleshooting steps for pairing and connectivity before trying repairs.
A useful trick here. Try testing in a game training range with zero deadzone settings. Then compare it with normal game settings.
Method C: Test on PC (Steam Input or System Tools)
PC testing can give more consistent measurements. Tools like Steam Input allow basic controller configuration and calibration checks.
According to Steam Support documentation, Steam Input provides controller configuration and calibration options that help validate controller input behavior.
Time
About 3 minutes
Difficulty
Easy to moderate
Best for
Accurate axis readings and calibration checks
Steps
- Connect the controller to the PC using a USB cable or Bluetooth.
- Open Steam and go to controller settings.
- Enable Steam Input for the controller.
- Open the controller configuration panel.
- Move each stick and observe the calibration graph.
- Test buttons and triggers one by one.
What to record
• Joystick center position
• Axis range during movement
• Trigger response curve
• Any input delay or missed presses
Platform notes
• Windows
Use Steam Input or check controller details in Device Manager.
• macOS
Steam controller configuration can read joystick input.
• Linux
Many distributions detect controllers automatically through system input tools.
Small tip from experience. Disable other controller software overlays before testing. Multiple tools running at the same time can cause confusing readings.
How to Read Controller Tester Results (Thresholds and Simple Examples)
This part confuses a lot of people. You open a tester and see numbers moving. But what do they mean?
Most PS5 controller tester tools show normalized axis values. These numbers describe joystick movement from center to edge. If the stick sits exactly in the middle, the value should stay close to zero.
Two things matter the most.
• Center offset
• Jitter
These help you decide if the controller has real stick drift or just small noise. I use simple drift threshold rules as practical guidelines. They are not official Sony specs, just useful test rules.
Before deciding anything, run the test three times and average the results. This small retest protocol helps remove random noise.
Quick Reading Guide
| Reading Type | What It Means | What to Watch |
| Center Offset | How far the stick sits from true center | Drift if value stays off center |
| Jitter | Small random movement while idle | Unstable signal or stick wear |
| Axis Range | Movement from center to edge | Should move smoothly |
| Deadzone Behavior | How the game ignores small input | Too small deadzone shows drift |
Practical Threshold Guidelines
These numbers work well as testing heuristics.
• Center offset greater than 0.05 often signals real stick drift.
• Jitter greater than 0.02 usually means unstable or noisy stick readings.
Again. These are practical test guides, not official manufacturer limits.
Example Result Cards
Healthy Controller
• Center offset around 0.01 to 0.02
• Jitter very small or almost none
• Axis movement smooth in every direction
Result
Controller input looks stable.
What to do
No repair needed. Just keep normal deadzone settings in games.
Borderline Controller
• Center offset around 0.03 to 0.05
• Small jitter spikes while idle
• Movement mostly smooth
Result
Controller may feel slightly loose.
What to do
Increase the deadzone slightly and run another calibration test. Then retest.
Failed Controller
• Center offset greater than 0.05
• Jitter spikes greater than 0.02
• Random axis movement when untouched
Result
This strongly suggests stick drift.
What to do
Try calibration and cleaning first. If readings stay the same after retesting, the stick module may need repair or replacement.
Small tip from experience. Take a screenshot of the tester results. Designers or support teams can add annotated callouts to show the offset and jitter clearly. That also helps when you compare before and after calibration results.
How to Calibrate a PS5 Controller (Start Safe, Then Try Advanced Fixes)
I usually start with the safest steps first. Many controller problems look like drift but come from pairing issues, firmware bugs, or wireless interference. So the plan is simple. First try soft fixes. Then adjust settings like deadzone and sensitivity. Only think about hardware cleaning if nothing else works.
The goal is simple. Calibrate the PS5 controller, run the same test again, and see if the readings improve.
Soft Calibration and Reset (No Disassembly)
This is the first thing I try when a controller shows drift or strange input. Many cases fix themselves after a reset or fresh pairing.
According to Sony PlayStation Support, users should follow official troubleshooting steps like reset and reconnect before trying repairs.
Follow these steps.
- Turn off the PS5 completely. Wait about 30 seconds. Then turn it back on.
- Connect the controller using a USB cable. Avoid Bluetooth for the first test.
- Open PS5 Settings, then go to Accessories and check the controller connection.
- Remove the controller from saved Bluetooth devices.
- Pair the controller again using the USB cable. This refreshes the connection.
- Find the small reset pinhole on the back of the DualSense controller.
- Use a paperclip and press the reset button for about 5 seconds.
- Turn the controller on again and reconnect it to the PS5.
- Run the same controller tester you used earlier and compare results.
Small tip from experience. Try testing away from other 2.4 GHz devices like routers or wireless dongles. Sometimes wireless interference can create strange input readings.
Advanced Calibration (Deadzone and Sensitivity Settings)
If the controller still feels off, adjusting settings can help. This does not repair the hardware, but it can reduce noticeable drift.
Important thing to remember. If the center offset is high, changing deadzone settings only hides the problem. It does not fix the stick.
Common adjustments include.
• Deadzone settings
Increase slightly if the stick moves when idle.
• Stick sensitivity
Lower sensitivity if aim feels too jumpy.
• Response curve
A smoother curve can make movement feel more stable.
• Input smoothing
Some games use smoothing to reduce small spikes.
Where you can adjust these settings:
| Location | Pros | When to Use |
| In game settings | Quick and simple | Best for gameplay fixes |
| Platform settings | Affects multiple games | Useful for consistent feel |
| PC tools | More detailed calibration | Best for testing and analysis |
After making any change, run another calibration test. Always compare results to your previous readings.
Hardware Cleaning and Stick Module Fixes (Only if Out of Warranty)
This step comes last. Opening a controller can void the warranty, so only do it if the controller is already out of warranty.
Dust, debris, or worn parts inside the stick module can cause drift. Cleaning sometimes helps.
According to iFixit repair documentation, DualSense internal components and repair paths can be identified through teardown guides.
| Situation | Recommended Action |
| Controller still under warranty | Contact support instead |
| Minor drift and old controller | Cleaning may help |
| Severe drift or damage | Stick module replacement likely |
High level cleaning steps.
- Turn off the controller and disconnect power.
- Open the controller carefully using a proper teardown guide.
- Inspect the stick module area.
- Use a small amount of isopropyl alcohol on a cotton swab to clean around the potentiometer area.
- Let everything dry fully before reassembly.
Take photos of each step during disassembly. That helps with reassembly and also provides evidence if you later need to contact support.
After cleaning or reassembly, always run the controller tester again.
Post Calibration Validation Checklist (Confirm the Fix)
Now comes the most important step. Retest the controller using the same method you used earlier. This gives a clear before and after comparison.
Use this quick validation checklist.
- Joystick stays stable at the idle center position
- Center offset remains below about 0.05 during testing
- Jitter stays under about 0.02 when the stick rests
- Axis movement looks smooth across the full range
- No random spikes appear in the axis graph
- Buttons register correctly without double input
- Triggers respond smoothly through the full range
- No sudden movement inside PS5 menus or games
- Gameplay aim feels stable with your current deadzone settings
If the controller now behaves normally, calibration likely worked.
If problems remain, take screenshots of your tester readings and save them. Those screenshots help a lot if you need a warranty claim, repair request, or replacement.
Common PS5 Controller Problems and Fixes (Troubleshoot by Symptom)
I see this mistake a lot. People change five settings at once and then the results make no sense. The better way is simple. Change only one variable at a time. Test again. Then decide the next step.
Below are the most common controller issues I run into when using a PS5 controller tester. Each section shows likely causes, quick fixes, and when it may be time to repair or replace the controller.
Stick Drift or Off Center Aim
This is the most common problem. The camera slowly moves even when the stick is not touched.
Likely causes
• High center offset in joystick readings
• Worn stick module inside the controller
• Very small deadzone settings in a game
• Wireless interference affecting the signal
If the tester shows a center offset greater than 0.05, it often means real stick drift based on our test guideline.
Try this first
- Run the same controller tester again and confirm the offset reading.
- Connect the controller using a USB cable and test again to rule out wireless issues.
- Reset the controller and re pair it with the console.
- Increase the in game deadzone slightly and check if the aim stops drifting.
- Run a full calibration test again and compare the readings.
When to escalate
• Offset stays above 0.05 after calibration
• Drift appears in every game and menu
• Controller shows the same behavior during wired tests
At that point the stick module may need cleaning or replacement.
Jitter, Random Spikes, or Shaky Stick Readings
Sometimes the joystick looks stable at first, but the tester shows small jumps or spikes.
That is usually jitter.
Likely causes
• Dust or wear inside the stick module
• Loose connection or worn potentiometer
• Electrical noise or interference
• Unstable USB cable connection
If jitter is greater than about 0.02, the signal may be unstable. This number works as a practical guideline.
Try this first
- Run the tester three times and average the readings.
- Place the controller on a flat surface and keep hands off the sticks.
- Try another USB cable if testing on PC.
- Move away from routers or wireless devices that may cause interference.
- Repeat the test using both wired and Bluetooth modes.
Quick environment check
• Controller resting on a flat table
• Stable USB connection
• No nearby wireless interference
If the spikes remain after several tests, the stick hardware may be wearing out.
Buttons Not Registering, Double Presses, or Trigger Issues
This problem shows up when a button fails to register or fires twice.
Likely causes
• Dirt or debris under the button
• Worn button membrane
• Software mapping conflict
• Faulty trigger input sensors
Try this first
• Run a button test using an online tester or PC tool.
• Press every button slowly and check the input display.
• Test L2 and R2 trigger input to confirm the trigger axis works smoothly.
• Restart the console and reconnect the controller.
Another helpful step is testing the controller in two environments.
• Test once on PS5
• Test again using a browser or PC controller tester
If the problem appears in both places, the issue is likely hardware.
When to escalate
• Buttons fail to respond in multiple tests
• The same button shows double input repeatedly
• Trigger input does not reach full range
At that point cleaning or button repair may be needed.
Disconnects, Pairing Problems, or Input Lag
Some players think their controller has drift, but the real issue is connection instability.
Likely causes
• Bluetooth interference
• Outdated firmware
• Weak USB cable connection
• Pairing problems between console and controller
Try these steps
- Turn off the PS5 and restart the system.
- Connect the controller using a USB cable and pair it again.
- Remove the controller from saved Bluetooth devices and reconnect it.
- Test the controller again in the PS5 menu.
- Try another USB cable or another console port.
When to escalate
• Controller disconnects repeatedly during wired tests
• Severe input lag appears in menus and games
• Pairing fails after reset attempts
In those cases, contacting support or replacing the controller may be the safest option.
Test → Decide → Next Step (Simple Troubleshooting Flow)
When a controller acts weird, I like to follow a clear troubleshooting flowchart. It keeps things simple and avoids random guessing. The idea is easy. Test the controller, check the readings, decide the problem, then take the right next step.
A designer can turn this logic into a visual decision tree, but the text version below works the same way.
Basic troubleshooting flow
- Run a PS5 controller tester and record the joystick readings.
- Check the center offset.
• If offset is greater than 0.05, drift is likely.
→ Try calibration or deadzone adjustment. - Check for jitter or spikes.
• If jitter is greater than 0.02, the signal may be unstable.
→ Retest using a USB connection and repeat the test. - If readings look normal but gameplay still feels wrong.
→ Check game deadzone settings and sensitivity. - If problems remain after calibration and retest.
→ Stop and document evidence. Save tester screenshots and controller photos. - Final step. Decide the next steps.
• Clean the controller
• Repair the stick module
• Replace the controller or contact support
This simple flow helps you move step by step instead of guessing fixes.
Advanced Verification and Anti Counterfeit Checks for DualSense
I have seen people buy a cheap DualSense online and later realize something feels wrong. Buttons feel different. Firmware does not update. Or the controller shows strange device data. This section helps you run a basic authenticity check if you suspect a counterfeit controller.
We will check serial labels, regulatory IDs, and device data like VID PID and firmware info. Real Sony controllers often show USB vendor ID 0x054C. If you suspect a fake, take screenshots and photos first. Do not open the controller yet.
Verify Serial Numbers, Model Codes, and Regulatory IDs (FCC or IC)
Every real controller includes product identifiers. These appear on the controller label and usually on the retail box.
Start with a simple serial number and model code check.
Steps
- Look at the back of the controller near the grip area. Find the regulatory label.
- Note the serial number and model code printed there.
- Check the retail box for matching labels. The serial number and model code should match the controller.
- Locate the FCC ID or IC ID on the label or packaging.
- Search that ID in the official FCC equipment database.
According to the FCC Equipment Authorization system, approved devices appear in the regulatory database with manufacturer and product details.
When you search the ID, verify these details.
• Brand name shows Sony or Sony Interactive Entertainment
• Product description matches a controller device
• Model identifiers match the controller generation
Sony USB devices commonly use vendor ID 0x054C, which you may see later during device inspection.
Photo checklist
Before contacting support, capture clear photos of:
• Controller regulatory label
• Retail box label
• Serial number close up
• Any included manual or insert
These photos help confirm authenticity during support checks.
Use PC or Android Tools to Inspect VID PID and Device Data
Sometimes the easiest way to spot a fake controller is by checking its device information. Real controllers report proper VID PID, device descriptors, and firmware identifiers.
Tools you can use
• Windows Device Manager
• USBDeview
• Linux lsusb
• macOS System Information
• Android apps like nRF Connect or Bluetooth Inspector
Sony USB controllers typically show VID 0x054C.
Example inspection workflow
- Connect the controller to a PC using a USB cable.
- Open Device Manager on Windows or run lsusb on Linux.
- Locate the connected controller device entry.
- Read the VID and PID values shown in the device descriptor.
- Confirm the vendor string references Sony or Sony Interactive Entertainment.
Things to note
• Vendor ID value
• Product ID value
• Device name or vendor string
• Firmware version if visible
Possible red flags
• Unknown vendor ID instead of Sony
• Vendor string that does not mention Sony
• Missing firmware information
• Strange device names unrelated to controllers
If several of these appear together, the controller may not be genuine.
Pre Purchase Checklist for Spotting Fake DualSense Listings
If you are buying a used controller, a few quick checks can reduce the risk of a fake.
Pre purchase checklist
• Ask for clear packaging photos showing labels
• Request a serial number photo from the controller
• Check the seller reputation and previous reviews
• Confirm a valid return policy exists
• Compare the listing price to normal market prices
Common marketplace red flags
• Price far lower than normal retail value
• Stock images instead of real photos
• Seller avoids showing serial or label images
• New accounts with no selling history
Quick risk score
High risk
Very low price and no label photos
Medium risk
Limited photos but normal seller history
Low risk
Clear label photos and trusted seller profile
Simple message template
Hello. Could you please send a close photo of the controller serial label and the box label? A short video showing the controller turning on would help too. Thank you.
This quick request often reveals whether the seller actually has the product.
How to Document Evidence and Report Counterfeit Controllers
If you suspect a fake controller after purchase, documentation matters a lot.
Do not open or modify the device. Keep everything exactly as it arrived.
Steps to document evidence
- Take clear photos of the controller and packaging.
- Capture the serial number and regulatory label.
- Save screenshots of tester results and device data.
- Save the invoice or transaction ID from the purchase.
- Capture the seller listing page and seller profile link.
- Save message screenshots between you and the seller.
Evidence checklist
• Controller photos
• Box label photos
• Serial number image
• Purchase receipt
• Transaction ID
• Seller profile link
• Message screenshots
Once everything is documented, report the issue.
Typical reporting options
• File a marketplace claim through the store platform
• Contact Sony support with the serial number and photos
• Report suspicious sellers to consumer protection agencies if needed
Example marketplace message
Hello. I believe the controller I received may be counterfeit. The serial number and device identifiers do not match expected Sony hardware. I have attached photos and device screenshots. Please review and advise on a return or refund.
Keeping organized evidence makes the report process much smoother.
Related Controller Test Tools for Other Consoles
Sometimes people test the wrong controller with the wrong tool. And then the button mapping looks broken. I have seen that happen a lot. The simple fix is to use the controller test made for your device. Each gamepad tester reads inputs a bit differently depending on the controller type.
Here are a few useful testers if you want to check other controllers or run a stick drift test on different systems.
• Xbox controller test
Good for checking joystick movement, triggers, and button input on Xbox controllers.
• Xbox 360 controller test
Helps verify older Xbox 360 controllers and detect drift or button issues.
• PS4 controller test
Useful if you want to test a DualShock controller with a browser tester.
• Switch Pro controller test
Designed for testing Switch Pro sticks and trigger input.
• Joy Con test
Good for detecting Joy Con drift and checking stick movement.
• CyberFanatix controller tools
A hub with multiple browser based testers for different controllers.
Small tip. Always use the tester that matches your controller type. That prevents input mapping confusion during testing.
Final Steps to Get Accurate Controller Input Again
I like to keep this process simple. Most controller problems become clear once you test the inputs and look at the readings. A good controller tester shows what the sticks and buttons are actually doing. After that, you can calibrate the PS5 controller, adjust settings, or decide if a repair makes more sense. The important part is testing again after every change.
FAQs
Will calibration fix PS5 stick drift permanently?
Not always. Calibration can reduce stick drift, but it does not repair worn hardware. If the center offset stays high after calibration, the stick module may be wearing out. You can increase the deadzone as a workaround, but a repair or replacement may still be needed later.
What’s the best PS5 controller tester to use (online vs PS5 vs Steam)?
Honestly, I use more than one. An online controller tester shows clear axis readings and button input. PS5 testing checks pairing and controller feel. Steam Input on PC gives detailed calibration data. Using two methods helps confirm the results.
How do I know if my controller readings are bad?
Look at the center offset and jitter values. If the offset stays above about 0.05, the controller likely has stick drift. If jitter goes above about 0.02, the signal may be unstable. Run the test three times and average the readings before deciding.
Should I increase deadzone or repair the stick module?
Increasing deadzone can hide small drift and make the controller playable again. But it is only a workaround. If the drift keeps getting worse or the offset stays high after calibration, the stick module may need cleaning, repair, or replacement.
How can I check if a DualSense is counterfeit before buying?
Ask the seller for clear photos of the serial number, model code, and the FCC ID label. Compare them with official product details. Also check the seller reputation and request a short power on video. Real listings usually provide clear label photos.
What VID or PID should a real Sony controller show over USB?
Many genuine Sony controllers report the USB vendor ID 0x054C when connected to a computer. You can see this in tools like Device Manager or USB device viewers. If the VID PID data shows an unknown vendor, the controller may be suspicious.
What should I do if I suspect my controller is fake after purchase?
First, keep the controller and packaging exactly as they arrived. Take photos of the labels, serial numbers, and FCC ID. Save the receipt, order ID, and seller page. Then report the issue to the marketplace and contact Sony support with the evidence.